Mastery of the iPod Starts Here
Archive for November, 2009
Get your invite quick! Lockerz is restocking soon!
Nov 18th

Lockerz.com has announced they will be restocking their prizes this month and launching the official site by the end of this month. Get some PTZ and redeem them now before the PTZ costs go up!
What are you waiting for? Join Lockerz now! Get an Invite using the form below and start collecting PTZ!
[contact-form 1 "lockerz"]
Enable Tethering on 3.1.2 iPhone 3G, 3GS
Nov 13th
These are instructions on how to patch the CommCenter of your 3.1.2 iPhone 3G, 3GS to enable Internet tethering.
Warning: These are advanced instructions and are not suggested for beginners.
Prerequisites: You must be jailbroken on the iPhone 3.1.2 firmware. You need to have SSH installed and you need to know the IP Address of your device on the local network. Finally you will also need Fugu installed.
Step One
 Step Two
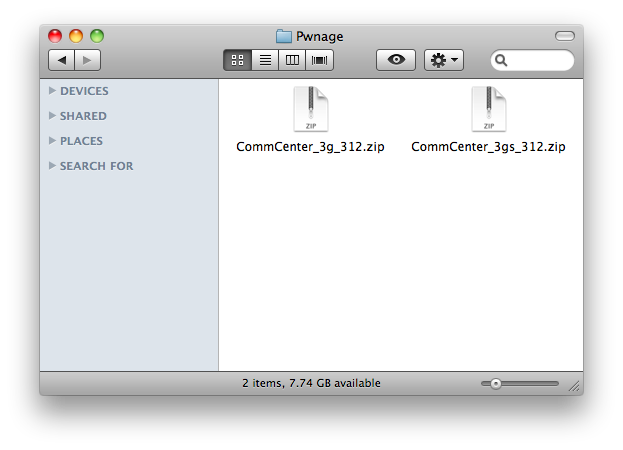
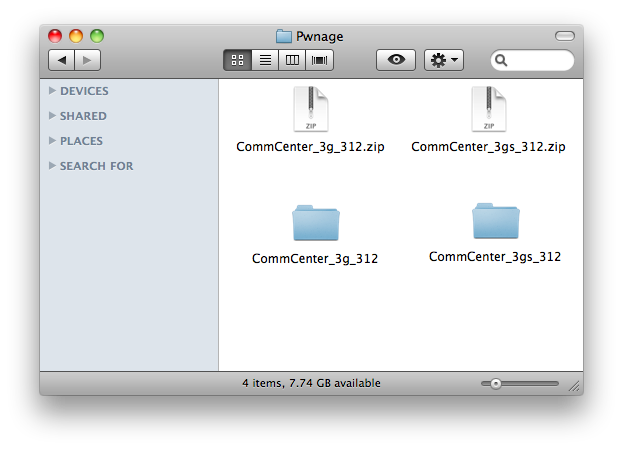
Double the download zip file to extract its contents. You will get a folder called CommCenter_3g_312 or CommCenter _3gs_312.
Step Two
Double the download zip file to extract its contents. You will get a folder called CommCenter_3g_312 or CommCenter _3gs_312.
 Step Three
Launch Fugu from your applications folder.
Step Three
Launch Fugu from your applications folder.
 Step Four
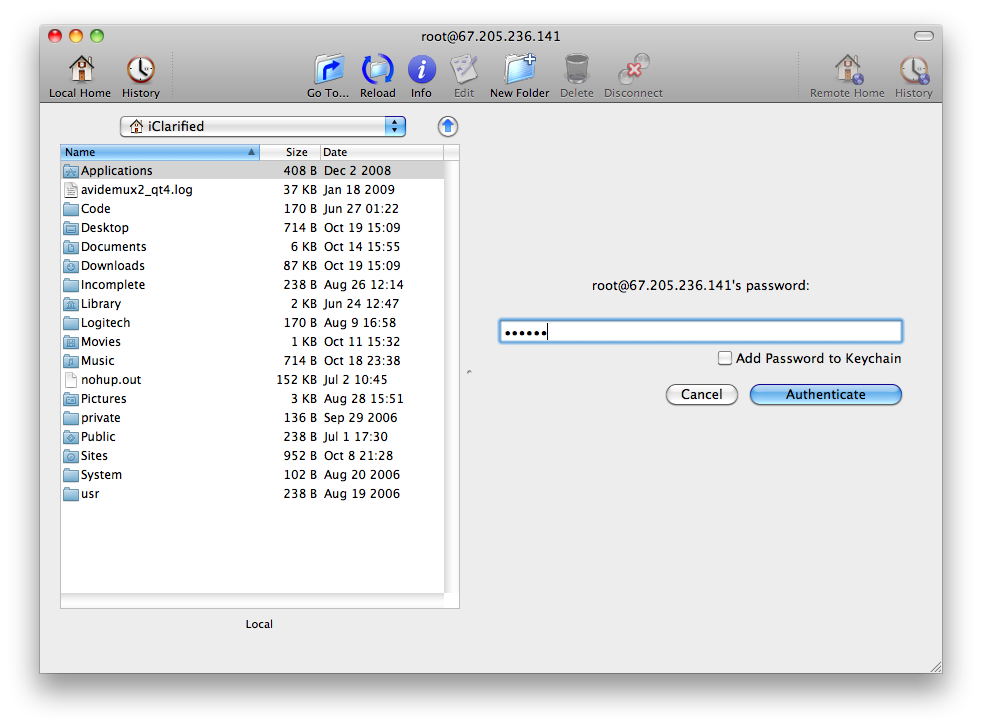
Input your iPhone’s IP Address in the Connect To: field and use root as the Username. Click the Connect button to continue. For this to work you must have SSH installed.
Step Four
Input your iPhone’s IP Address in the Connect To: field and use root as the Username. Click the Connect button to continue. For this to work you must have SSH installed.
 When prompted input alpine as the password then click the Authenticate button.
 Step Five
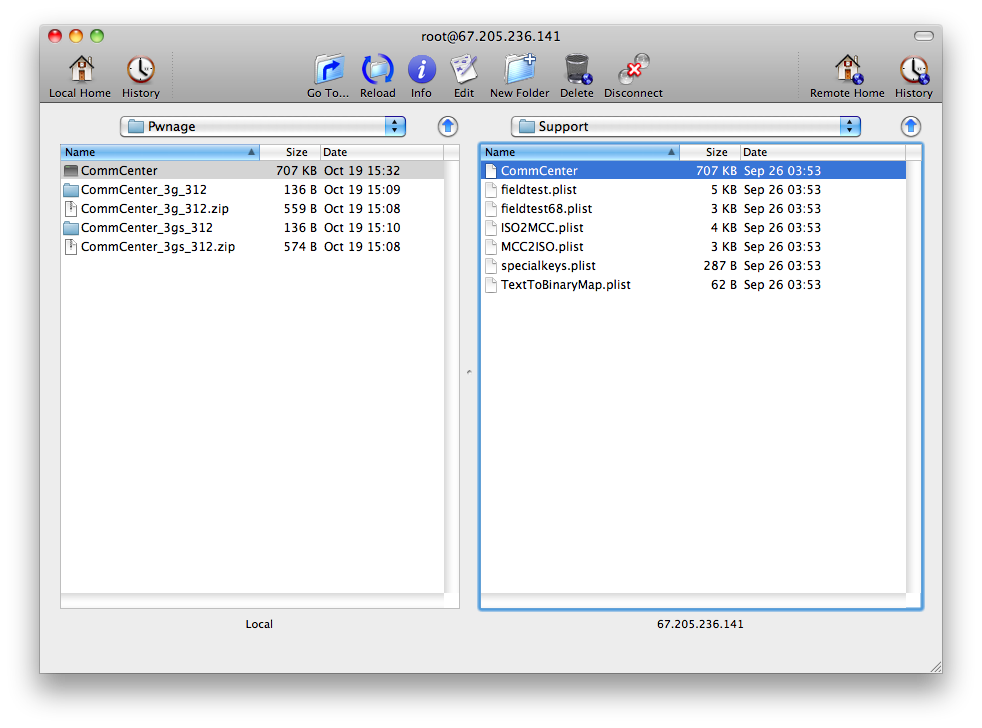
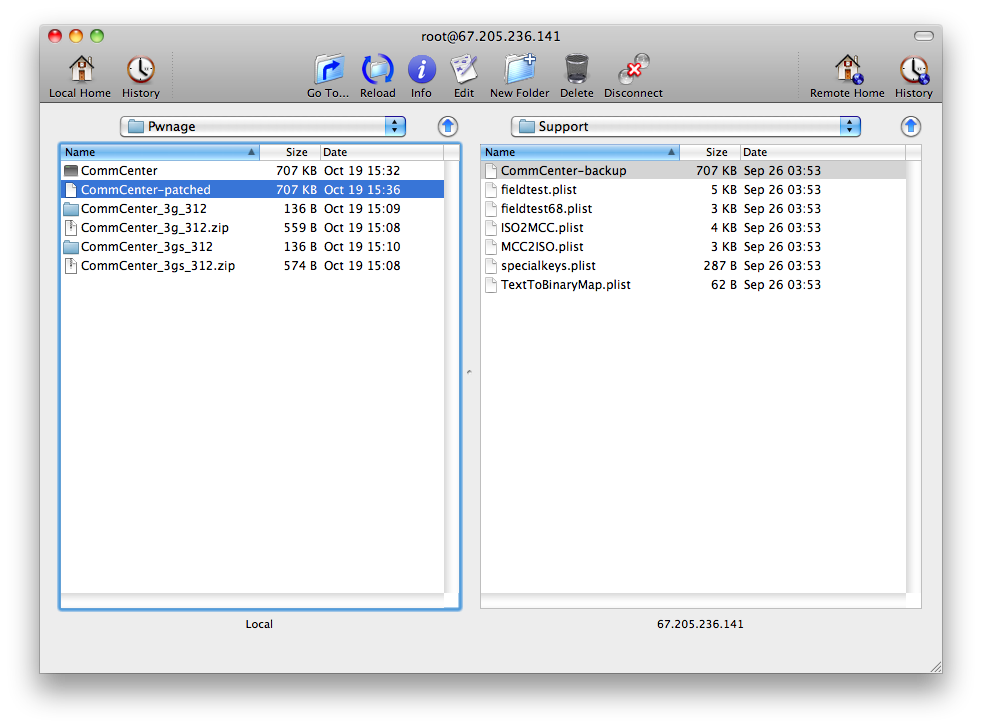
Once Fugu opens the directory contents of your device, use the left panel to navigate to the Pwnage folder on your desktop.
Step Five
Once Fugu opens the directory contents of your device, use the left panel to navigate to the Pwnage folder on your desktop.
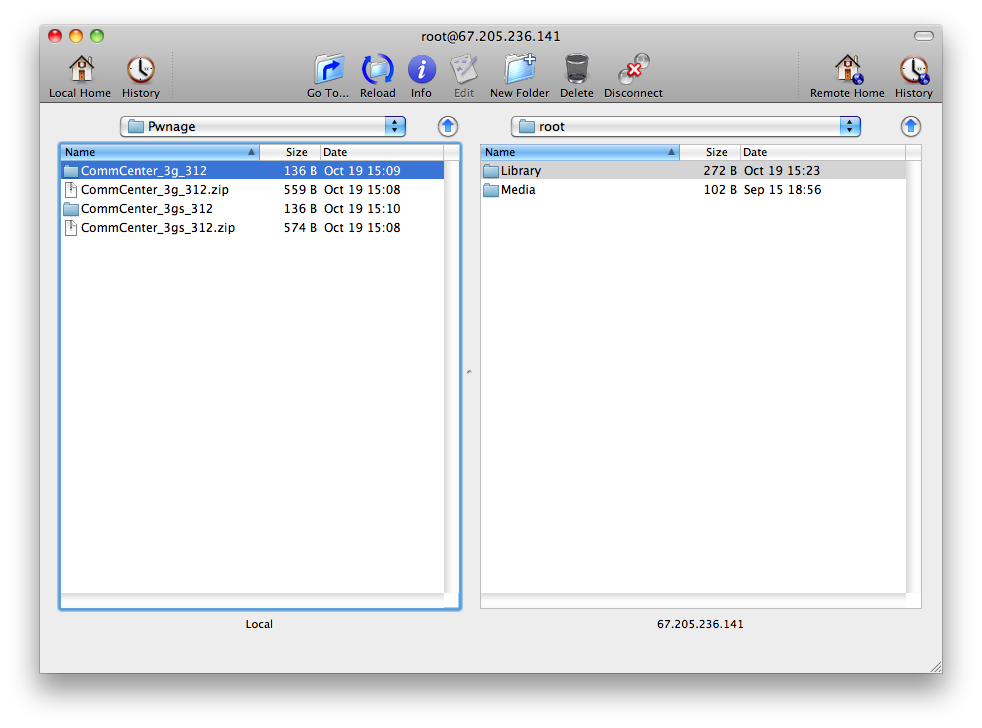 Next, click the Go To.. button on the toolbar.
 Input /System/Library/PrivateFrameworks/CoreTelephony.framework/Support/ into the Go To field, selectRemotely, then click the Go button.

Drag the CommCenter file from the right panel into the left panel to copy it to your computer.
 Step Six
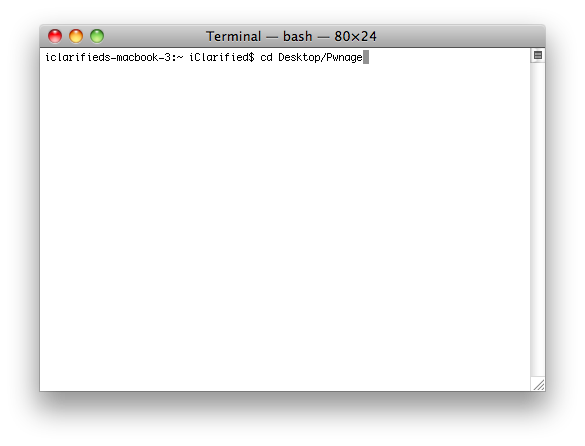
Launch Terminal by double clicking it from the Applications:Utilities folder on your computer.
Step Six
Launch Terminal by double clicking it from the Applications:Utilities folder on your computer.
 Execute cd Desktop/Pwnage to navigate to your Pwnage folder.
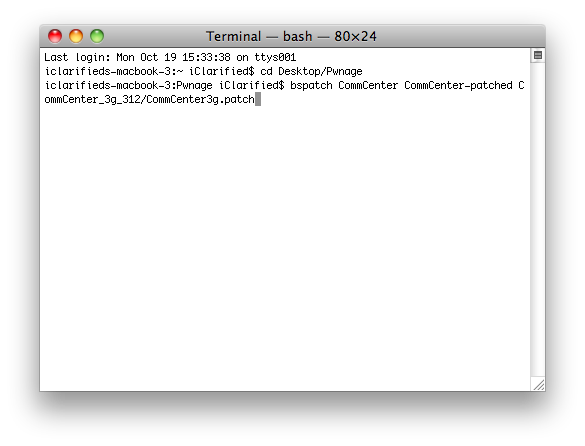
 Execute bspatch CommCenter CommCenter-patched CommCenter_3g_312/CommCenter3g.patch to make a patched version of the CommCenter.
IMPORTANT: Remember to change 3g to 3gs if you have the iPhone 3GS. ie. bspatch CommCenter CommCenter-patched CommCenter_3gs_312/CommCenter.patch
Execute bspatch CommCenter CommCenter-patched CommCenter_3g_312/CommCenter3g.patch to make a patched version of the CommCenter.
IMPORTANT: Remember to change 3g to 3gs if you have the iPhone 3GS. ie. bspatch CommCenter CommCenter-patched CommCenter_3gs_312/CommCenter.patch
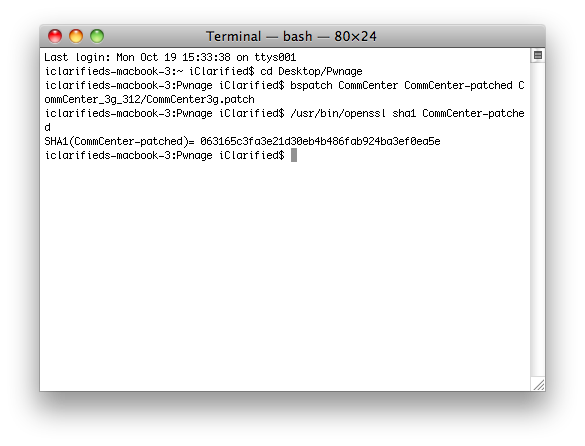
 Now we need to confirm that the patched file was created successfully. Input this command into the Terminal window to check: /usr/bin/openssl sha1 CommCenter-patched.
Check your SHA1 with the correct ones below to make sure the patch occurred successfully. If it did not. Do not continue.
1b19712035f33654cf72838ebe1a2033931b56b2 # 3GS
063165c3fa3e21d30eb4b486fab924ba3ef0ea5e # 3G
Now we need to confirm that the patched file was created successfully. Input this command into the Terminal window to check: /usr/bin/openssl sha1 CommCenter-patched.
Check your SHA1 with the correct ones below to make sure the patch occurred successfully. If it did not. Do not continue.
1b19712035f33654cf72838ebe1a2033931b56b2 # 3GS
063165c3fa3e21d30eb4b486fab924ba3ef0ea5e # 3G
 Step Seven
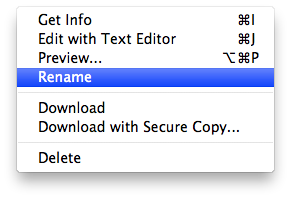
Return to Fugu and Control-Click CommCenter in the right panel. Select Rename from the contextual menu and rename the file to CommCenter-backup.
Step Seven
Return to Fugu and Control-Click CommCenter in the right panel. Select Rename from the contextual menu and rename the file to CommCenter-backup.
 Click the Reload button on the toolbar if necessary then drag the CommCenter-patched file from the left panel to the right.
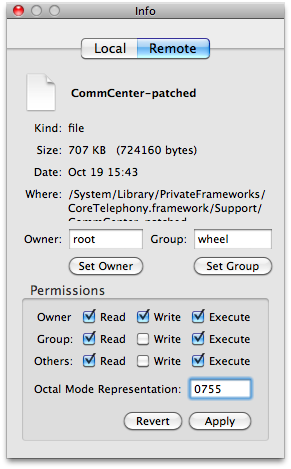
 Control-Click the CommCenter-patched file from the right panel and select Get Info from the contextual menu. At the bottom of the Info window change the permissions to 0755 and click the Apply button.
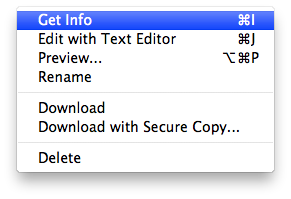

 Control-Click the CommCenter-patched file in the right panel and select Rename from the contextual menu. Rename the file to CommCenter.
 Step Eight
You may now reboot your iPhone and you will be able to use Internet Tethering. You may need to follow this tutorial to apply the correct settings for your carrier.
Step Eight
You may now reboot your iPhone and you will be able to use Internet Tethering. You may need to follow this tutorial to apply the correct settings for your carrier.
Enable Voice Control On iPhone 2G/3G
Nov 13th
Voice control will be a very useful feature for all of us, so i found a way to setting up the voice control in your iPhone 2G or 3G just slightly like iPhone3GS. (only for OS 3.0 and OS 3.1)

Two applications you need to download:-
2. Appflow ( from Cydia )
Without any other app by following here.
Here are two files which when added will give you a toggle for Voice Control in Settings-General-Home
/Applications/Preferences.app/English.lproj/Home Button.strings
/Applications/Preferences.app/English.lproj/Home Button.strings
Home Button.plist – Megaupload , Rapidshare , 2Shared
Homt Button.strings – Megaupload , Rapidshare , 2Shared
Homt Button.strings – Megaupload , Rapidshare , 2Shared
Instructions:-
1. You need to SSH the voice control.app into your \stash\Application
2. Set permission voice control.app to 0755
3. Respring
4. Go to cydia and search for appflow
5. Install Appflow
6. Open Appflow, scroll down until you get Voice Control and Assign To Double tap
7. Try your Voice Control by double tap your home button / double tap on the app icon.
Example: If your contact list have Annie, You can try say “Annie” then you’ll see the screen switch to Annie contact and you may say “Home” to call home, “Mobile to call mobile and so on~…
Voice commands:-
Switch to Contact
Switch to iPod
Switch to Bookmarks
Go Back
Try Again
Change the Root Password on Your iPhone
Nov 13th
These are instructions on how to change the root password on your jailbroken iPhone or iPod touch. This password is required when using SSH to connect to your device.
Step One
If you do not already have MobileTerminal installed please follow these instructions to install it.
Step Two
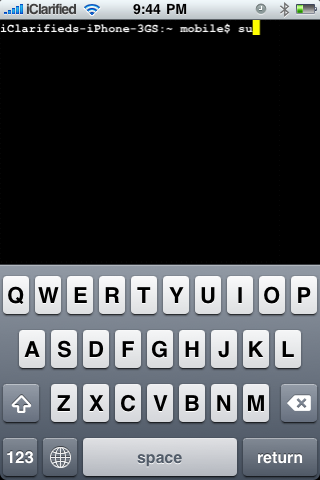
Press to launch MobileTerminal from your iPhone Springboard.
 Step Three
Input su into the terminal window then press the return key.
Step Three
Input su into the terminal window then press the return key.
 Step Four
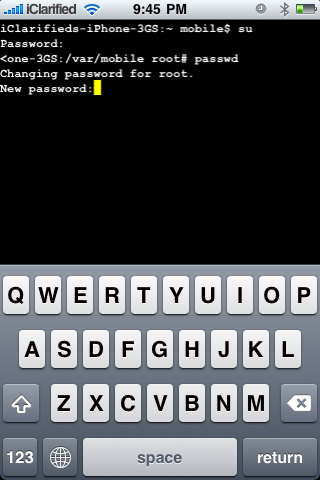
You will be asked to input the current root user password. Input alpine then press the return key.
Step Four
You will be asked to input the current root user password. Input alpine then press the return key.
 Step Five
Once you have logged in as the root user input passwd into the terminal window then press the return key.
Step Five
Once you have logged in as the root user input passwd into the terminal window then press the return key.
 You will be prompted for new password. Input a password of your choice then press the return key.
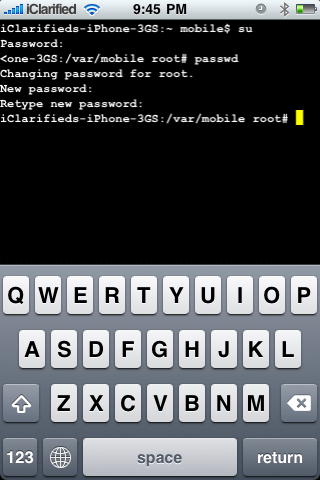
 You will be asked to retype the new password. Do this, then press the return key to finalize your change.

Block/Manage Outgoing iPhone Connections Using Firewall iP
Nov 13th
These are instructions on how to use Firewall iP to manage and block outgoing iPhone connections.
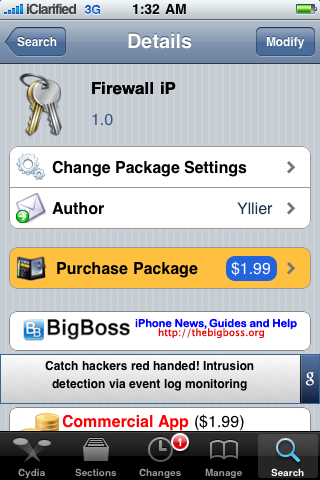
Firewall iP is a new application available from the Cydia Store. It will alert you when an iPhone app wants to establish a connection to a host and show you the hostname. Then you have the options to allow/deny the connection once/always or allow/deny all connections for the application.
Step One
Download and install Firewall iP from the Cydia Store if you do not know how to do this you can find a tutorialhere. The app is available for $1.99.
 Step Two
To begin to use Firewall iP we will need to monitor some outgoing traffic. Lets begin by opening a popular iPhone game reMovem (free).
Step Two
To begin to use Firewall iP we will need to monitor some outgoing traffic. Lets begin by opening a popular iPhone game reMovem (free).
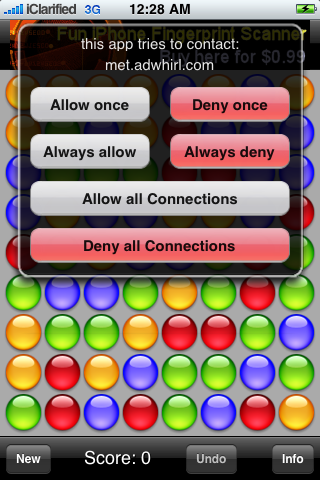
 As soon as the app launches, Firewall iP will monitor its network activity. When the app tries to make a connection to an external location Firewall iP will inform you of this.
A popup will appear similar to “this app tries to contact: mob.adwhirl.com”. You are now given the option to Allow once, Deny once, Always allow, Always deny, Allow all connections, and Deny all connections.
As soon as the app launches, Firewall iP will monitor its network activity. When the app tries to make a connection to an external location Firewall iP will inform you of this.
A popup will appear similar to “this app tries to contact: mob.adwhirl.com”. You are now given the option to Allow once, Deny once, Always allow, Always deny, Allow all connections, and Deny all connections.
 Since this is the free version of the reMovem app and the connection location indicates an adserver, we can assume that the app is trying to load an ad to display. Lets click the Deny once button to block the connection just this one time. The app may try to establish a connection multiple times and to contact different ad servers such as mm.admob.com, ad.qwapi.com, etc. Press the Deny once button till the prompts stop appearing. Notice the toolbar says reMovem free.

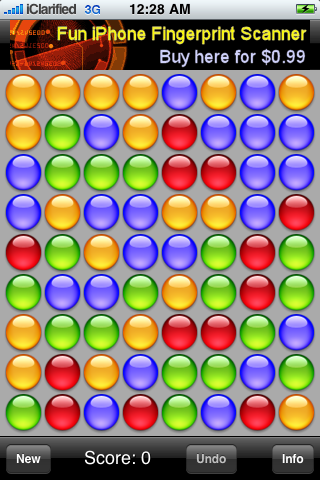
 Now press the Home button then relaunch reMovem (free). This time lets press Always allow for mob.adwhirl.com, mm.admob.com, ad.qwapi.com, etc. Now when the app loads you will notice the toolbar has a nice little ad in place of the words reMovem
 When using a free application you may get prompted again to confirm outgoing connections. If the application is from a trust worthy developer you can use the Allow all connections button to approve all outgoing connections for the application.
Remember developers who make ad supported applications depend on this advertising revenue. Please do not block the traffic which supports their work.
Step Two
Let us try to monitor some outgoing traffic of a paid application; for example, Snapture.
Launch the application from your Springboard. The app first tries to establish a connection to snapturelabs.com. This could be a valid connection which checks for updates or similar. Lets press Always allow for now.
When using a free application you may get prompted again to confirm outgoing connections. If the application is from a trust worthy developer you can use the Allow all connections button to approve all outgoing connections for the application.
Remember developers who make ad supported applications depend on this advertising revenue. Please do not block the traffic which supports their work.
Step Two
Let us try to monitor some outgoing traffic of a paid application; for example, Snapture.
Launch the application from your Springboard. The app first tries to establish a connection to snapturelabs.com. This could be a valid connection which checks for updates or similar. Lets press Always allow for now.
 Following this connection attempt Snapture tries to connect to beacon.pinchmedia.com and analytics.localytics.com. These connections are likely to collect usage and user data. To prevent these you could press Always deny or if you want to prevent all outgoing connections you can press the Deny all connections button.

 Step Three
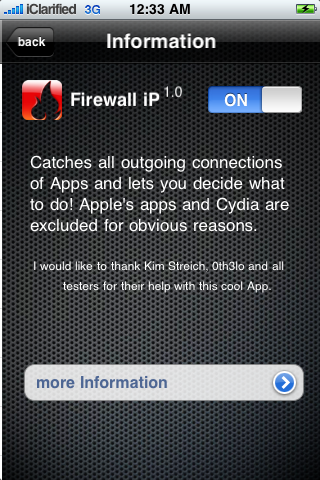
By default Firewall iP is enabled after installed. To turn on and off the firewall simply press to launch Firewall iP from the Springboard then press the i at the top right of the screen. You will see a switch which can be used to turn on and off Firewall iP.
Step Three
By default Firewall iP is enabled after installed. To turn on and off the firewall simply press to launch Firewall iP from the Springboard then press the i at the top right of the screen. You will see a switch which can be used to turn on and off Firewall iP.


 Step Four
You can also manage rules you have already set in place from the Firewall iP application.
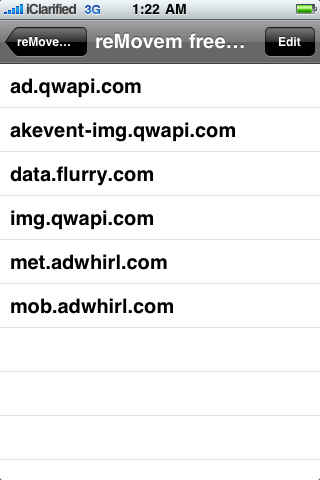
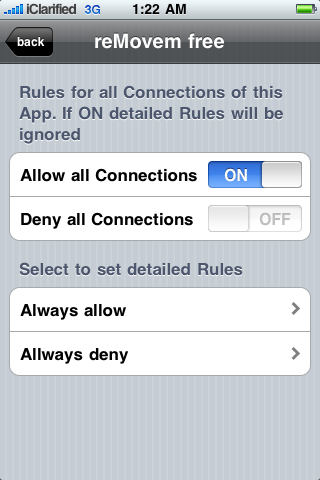
The main screen displays a list of applications for which rules have been set. Press to select an application from this list.
You will notice two switches. One switch will allow all connections for the app. The other will deny all connections for the app. There is also two buttons. One displays all the always allow rules. The other displays all the always deny rules.
Step Four
You can also manage rules you have already set in place from the Firewall iP application.
The main screen displays a list of applications for which rules have been set. Press to select an application from this list.
You will notice two switches. One switch will allow all connections for the app. The other will deny all connections for the app. There is also two buttons. One displays all the always allow rules. The other displays all the always deny rules.
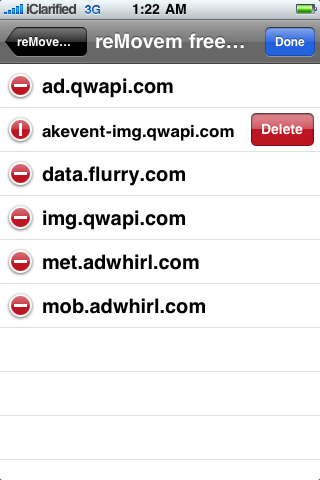
 Press to select Always allow to view its list. To remove a rule from the list simply press the Edit button at the top right of the screen then press the delete icon to the left of the rule you would like to remove. To confirm the removal press the Delete button then press the Done button at the top right to exit edit mode.

 To override the individual rules just switch on the Allow all connections or the Deny all connections toggle.

 Step Five
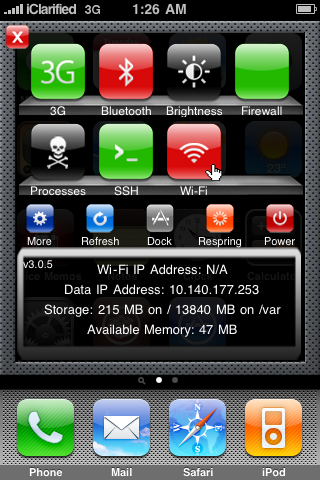
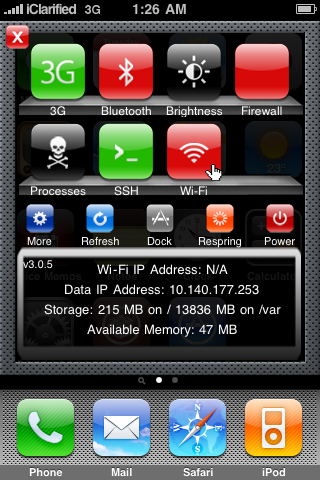
Firewall iP can also be easily enabled or disabled using a SBSettings toggle.
Step Five
Firewall iP can also be easily enabled or disabled using a SBSettings toggle.
Unlock iPhone 3G and3GS – BlackSn0w
Nov 13th
These are instructions on how to unlock the iPhone 3G and 3GS using BlackSn0w. To follow these instructions you must be on the 05.11.07 baseband and have already jailbroken.
If you have not already jailbroken it will be easier to follow one of these tutorials which will walk you through both jailbreaking and unlocking.
- Windows
- Mac
Lets begin…

Watch the Video!
For your convenience this tutorial is available in video format also. Click the Watch It button to view the tutorial!
Step One
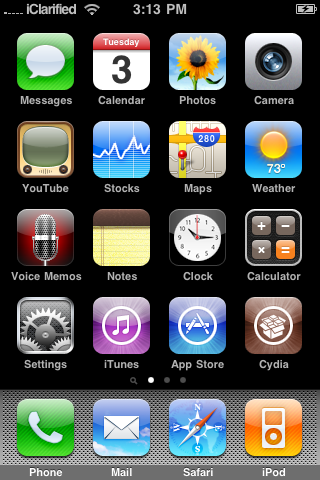
Press to launch Cydia from your iPhone Springboard.
Step Two
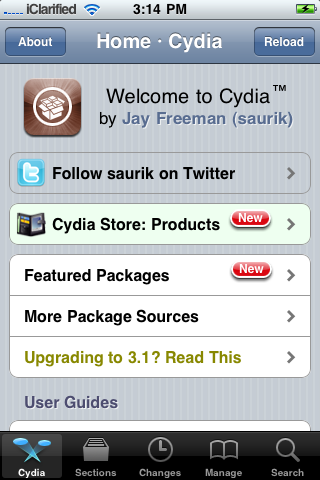
Press to select Manage from the tabs at the bottom of the screen.
Step Three
Press the large Sources button.

Step Four
Press the Edit button at the top right of the screen.

Step Five
Press the Add button at the top left of the screen.

Step Six
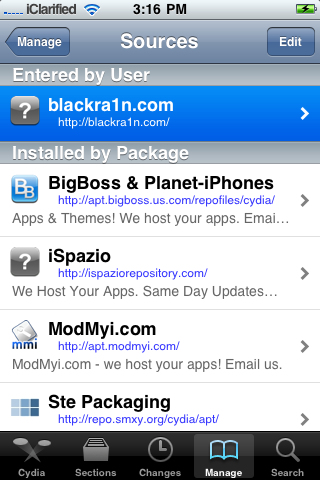
Input http://www.blackra1n.com as the source address then press the Add Source button. Once Cydia has added the source press the large Return to Cydia button.


Step Seven
Press the Done button at the top right of the screen.

Step Eight
Press to select blackra1n.com from the list of sources.
Step Nine
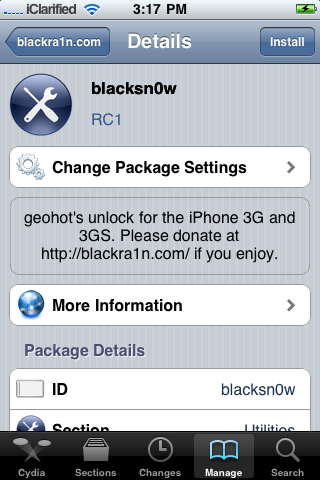
Press to select blacksn0w from the list of packages.

Step Ten
Press the Install button at the top right of the screen.
Step Eleven
Press the Confirm button at the top right to begin installation.

Step Twelve
Once the unlock has been installed successfully press the large Return to Cydia button.
Step Thirteen
Wait a few minutes for your CommCenter to restart and you will now be able to use the SIM card of your choice on your unlocked iPhone!

***THANKS: Congratulations and thanks to Geohot for making this unlock possible. You can donate towards his efforts at www.blackra1n.com.
How To Unlock/Jailbreak Your iPhone 2G on OS 3.1.2 Using Blackra1n
Nov 8th
The Blackra1n RC3 software is available for both Windows and Mac users, and it supports iPhone 2G, iPhone 3G, iPhone 3GS. Blackra1n RC3 is the most advanced and easy to use utility. Blackra1n RC3 includes the Blacksn0w “ unlock for the latest 05.11.07 baseband ” “ enable official tethering ” and a ” huge 15 second speed improvement ”. We already published the Jailbreak Unlock iPhone 3G 3GS 3.1.2 with Blackra1n. Here’s the guide that allows you to run the Jailbreak, activation and unlocking the phone part of all the EDGE. Please note Blackra1n is just for jailbreak later we need a working Wi-Fi connection to Install BootNeuter from Cydia.
Step One : Download
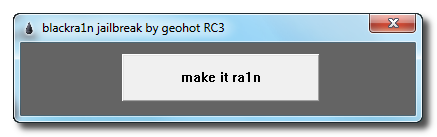
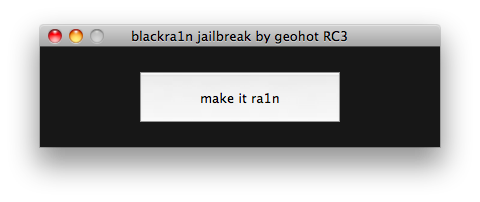
Blackra1n RC3 and double click the rain drop icon to launch the program
Step Two : Click the make it ra1n button.
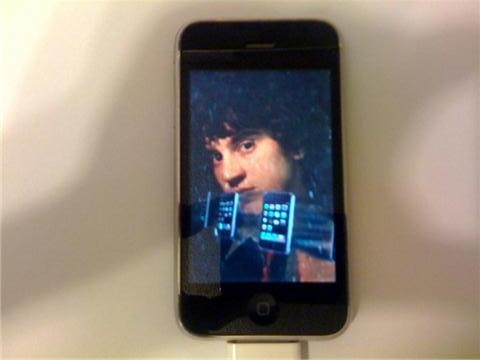
Step Three : You iPhone will now be placed in recovery mode. You will see a picture of GeoHot that replaces the
regular recovery mode screen on your device.
Step Four : Your iPhone or iPod Touch will reboot once blackra1n is done doing it’s thing and you should see the
blackra1n icon on there. If you don’t see the blackra1n icon, go to the last page on your iDevice and you should see it.
Step Five : Install Cydia from
the blackra1n app. You have the option of choosing Cydia, and Rock. I don’t recommend you to install both of them at once, because that may cause problems. Install them one
at a time then reboot and then second one.
Step Six : Open Cydia and run updates essential. Now se
arch for “BootNeuter” and install the bootneuter app. When BootNeuter Starts make sure that the application has following configurations.

Step Seven : When you are ready click on the button “Flash” and after a few seconds you will have unlocked the phone part of your iPhone 2G Warning do not interrupt the process of flashing : This may take some time before being completed, so you should have a little patience. ***THANKS: A big thanks to Geohot for making this jailbreak possible.
How to Unlock the iPhone 3G, 3GS Using BlackSn0w
Nov 8th
These are instructions on how to unlock the iPhone 3G and 3GS using BlackSn0w. To follow these instructions you must be on the 05.11.07 baseband and have already jailbroken.
If you have not already jailbroken it will be easier to follow one of these tutorials which will walk you through both jailbreaking and unlocking.
- Windows
- Mac
Lets begin…
Watch the Video!
For your convenience this tutorial is available in video format also. Click the Watch It button to view the tutorial!
Step One
Press to launch Cydia from your iPhone Springboard.
Step Two
Press to select Manage from the tabs at the bottom of the screen.
Step Three
Press the large Sources button.
Step Four
Press the Edit button at the top right of the screen.
Step Five
Press the Add button at the top left of the screen.
Step Six
Input http://www.blackra1n.com as the source address then press the Add Source button. Once Cydia has added the source press the large Return to Cydia button.
Step Seven
Press the Done button at the top right of the screen.
Step Eight
Press to select blackra1n.com from the list of sources.
Step Nine
Press to select blacksn0w from the list of packages.
Step Ten
Press the Install button at the top right of the screen.
Step Eleven
Press the Confirm button at the top right to begin installation.
Step Twelve
Once the unlock has been installed successfully press the large Return to Cydia button.
Step Thirteen
Wait a few minutes for your CommCenter to restart and you will now be able to use the SIM card of your choice on your unlocked iPhone!
***THANKS: Congratulations and thanks to Geohot for making this unlock possible. You can donate towards his efforts at www.blackra1n.com.
How to Jailbreak and Unlock Your iPhone 3G, 3GS Using BlackSn0w [Windows]
Nov 8th
These are instructions on how to jailbreak and unlock your iPhone 3G and 3GS using BlackRa1n and BlackSn0w for Windows.
These instructions will work with the latest 3.1.2 firmware, the 05.11.07 baseband, and iPhones which require hactivation.
For those with a new iPhone 3GS (updated Bootrom), BlackRa1n only supports a tethered jailbreak. This means that once jailbroken you should not let your battery die. If it does die you will need to reconnect it to the computer and use BlackRa1n to boot it.
Before continuing make sure you are on the 05.11.07 baseband. If you are not please update your firmware to 3.1.2 using iTunes before continuing.
You can find the Mac version of this tutorial here. Ok lets begin…
Step One
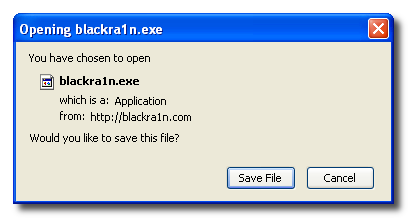
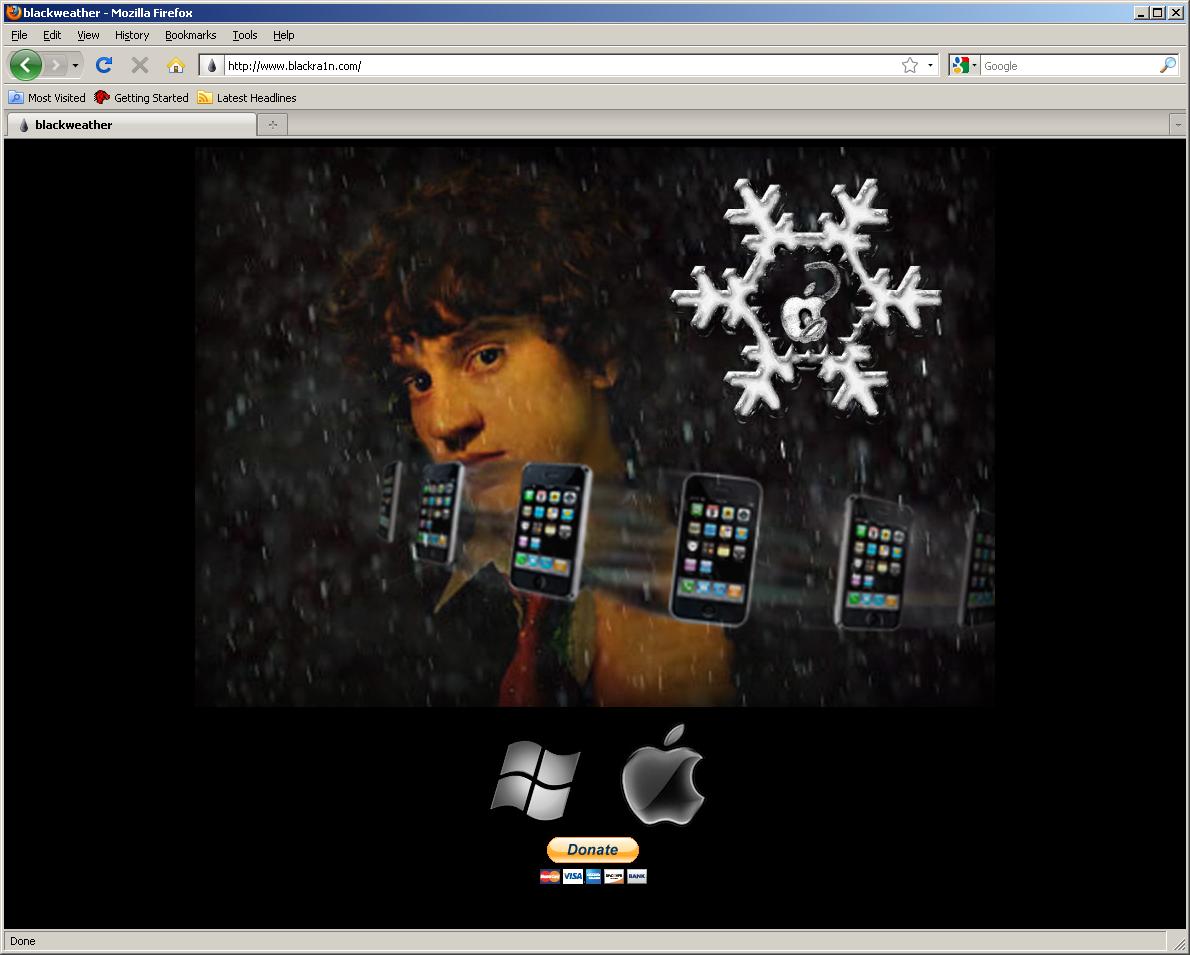
Open your web browser of choice and navigate to http://www.blackra1n.com. Click the Windows logo at the bottom of the screen.
 Step Two
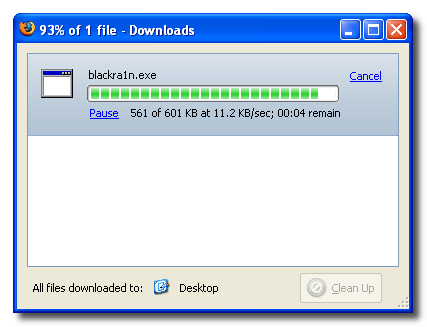
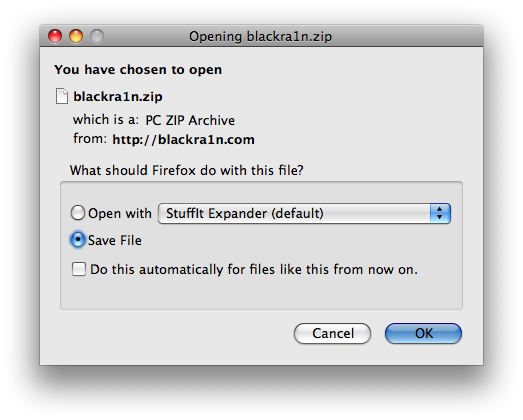
When prompted save the download to your desktop
Step Two
When prompted save the download to your desktop
 Step Three
Then double click the blackra1n executable file from the desktop to launch the program
Step Three
Then double click the blackra1n executable file from the desktop to launch the program
 Step Four
Make sure your iPhone or iPod is connected to the computer then click the large make it ra1n button
Step Four
Make sure your iPhone or iPod is connected to the computer then click the large make it ra1n button
 Step Five
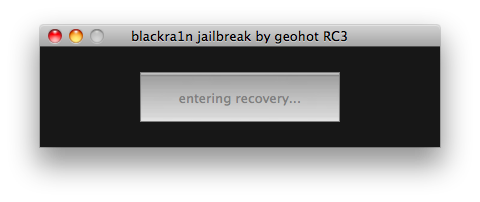
You iPhone will now be placed in recovery mode.
Step Five
You iPhone will now be placed in recovery mode.
 You will see a picture of GeoHot that replaces the regular recovery mode screen on your device.
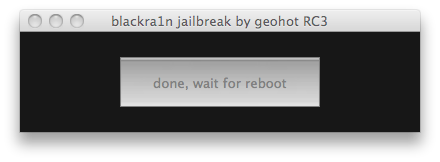
 blackra1n will run and then your device will reboot.
 A popup message will appear informing you that BlackRa1n is free software and if you appreciate it you can donate to GeoHot at [email protected].
 Step Six
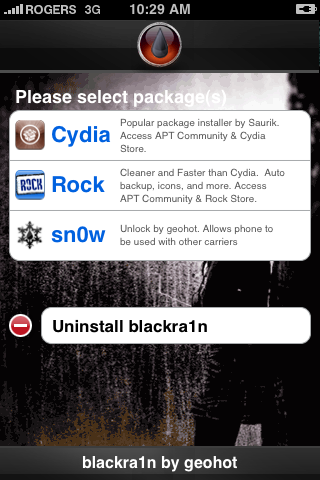
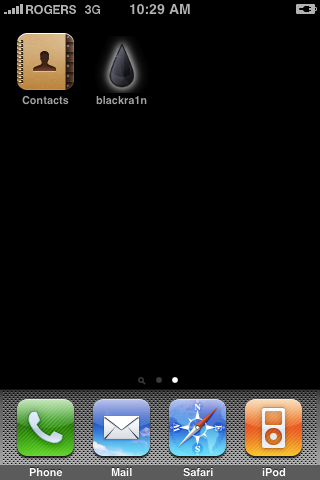
Once your device reboots it will be jailbroken and you will notice a blackra1n icon on the Springboard. Make sure you have an internet connection and press to launch the application.
Step Six
Once your device reboots it will be jailbroken and you will notice a blackra1n icon on the Springboard. Make sure you have an internet connection and press to launch the application.
 Choose the installer application of your choice then press to select sn0w if you would like to unlock your device. Press the Install button at the top right of the screen to begin.
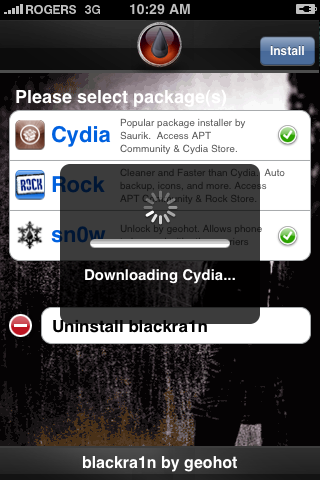
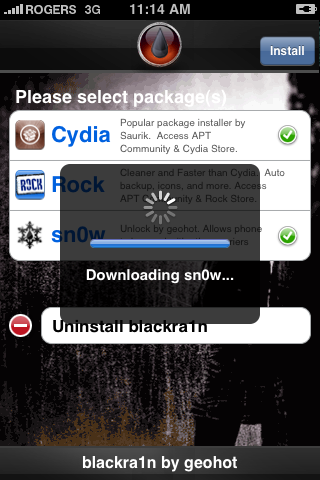
 BlackRa1n will begin to download and install the package you selected.
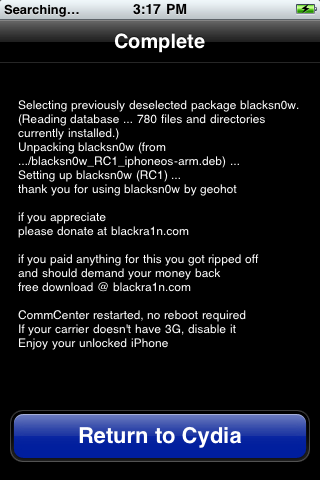
 If you chose to unlock device using blacksn0w you will be presented with a Post Install log for sn0w. CommCenter will be restarted and there is no need to reboot. If your carrier doesn’t support 3G then disable it. Press the Close button to continue.

 Step Seven
Once complete BlackRa1n will respring your iPhone and you will find the installer package of your choice on the Springboard.
Step Seven
Once complete BlackRa1n will respring your iPhone and you will find the installer package of your choice on the Springboard.
 Step Eight
Once you have confirmed your installer package is working correctly you may use the Uninstall blackra1nbutton inside the BlackRa1n app to remove it from your springboard.
Step Eight
Once you have confirmed your installer package is working correctly you may use the Uninstall blackra1nbutton inside the BlackRa1n app to remove it from your springboard.

 ***THANKS: A big thanks to Geohot for making this jailbreak possible.
How to Jailbreak and Unlock Your iPhone 3G, 3GS Using BlackSn0w [Mac]
Nov 8th
These are instructions on how to jailbreak and unlock your iPhone 3G and 3GS using BlackRa1n and BlackSn0w for Mac.
These instructions will work with the latest 3.1.2 firmware, the 05.11.07 baseband, and iPhones which require hactivation.
For those with a new iPhone 3GS (updated Bootrom), BlackRa1n only supports a tethered jailbreak. This means that once jailbroken you should not let your battery die. If it does die you will need to reconnect it to the computer and use BlackRa1n to boot it.
Before continuing make sure you are on the 05.11.07 baseband. If you are not please update your firmware to 3.1.2 using iTunes before continuing.
You can find the Windows version of this tutorial here. Ok lets begin…
Step One
Open your web browser of choice and navigate to http://www.blackra1n.com. Click the Apple logo at the bottom of the screen.
 Step Two
When prompted save the download to your desktop
Step Two
When prompted save the download to your desktop
 Step Three
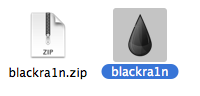
Then double click the downloaded blackra1n zip file to extract the application, then double click the application icon to launch the program
Step Three
Then double click the downloaded blackra1n zip file to extract the application, then double click the application icon to launch the program
 Step Four
Make sure your iPhone or iPod is connected to the computer then click the large make it ra1n button
Step Four
Make sure your iPhone or iPod is connected to the computer then click the large make it ra1n button
 Step Five
You iPhone will now be placed in recovery mode.
Step Five
You iPhone will now be placed in recovery mode.
 You will see a picture of GeoHot that replaces the regular recovery mode screen on your device.
 blackra1n will run and then your device will reboot.
 A popup message will appear informing you that BlackRa1n is free software and if you appreciate it you can donate to GeoHot at [email protected].
 Step Six
Once your device reboots it will be jailbroken and you will notice a blackra1n icon on the Springboard. Make sure you have an internet connection and press to launch the application.
Step Six
Once your device reboots it will be jailbroken and you will notice a blackra1n icon on the Springboard. Make sure you have an internet connection and press to launch the application.
 Choose the installer application of your choice then press to select sn0w if you would like to unlock your device. Press the Install button at the top right of the screen to begin.

 BlackRa1n will begin to download and install the packages you selected.

 If you chose to unlock device using blacksn0w you will be presented with a Post Install log for sn0w. CommCenter will be restarted and there is no need to reboot. If your carrier doesn’t support 3G then disable it. Press the Close button to continue.

 Step Seven
Once complete BlackRa1n will respring your iPhone and you will find the installer package of your choice on the Springboard.
Step Seven
Once complete BlackRa1n will respring your iPhone and you will find the installer package of your choice on the Springboard.
 Step Eight
Once you have confirmed your installer package is working correctly you may use the Uninstall blackra1nbutton inside the BlackRa1n app to remove it from your springboard.
Step Eight
Once you have confirmed your installer package is working correctly you may use the Uninstall blackra1nbutton inside the BlackRa1n app to remove it from your springboard.

 ***THANKS: A big thanks to Geohot for making this jailbreak and unlock possible.


Recent Comments